Back to All Guides
GET IN TOUCH
If you would like to get further information about Frog or help in getting it set up in your school please get in touch via the contact details below...
hello@frogeducation.com
Users
The Users application is a collection of tools that set and manage user information within your Frog platform.
The aim of this guide is to introduce you to:
- About Users
- Managing Basic Information
- Managing Authentication
- Managing Additional Information
- Managing Group Membership
- Adding a Relationship
- Manually Creating a New User
- Import/Export User Profiles
- Other Features
About Users
The Users application is designed to manage all the users within your Frog environment. By default, only Profile: Staff and Admin have access to this application.
Note: Many of the features of this app should not be used as most of the user data will be managed in the EMS. Frog will draw on this data and display much of it here.
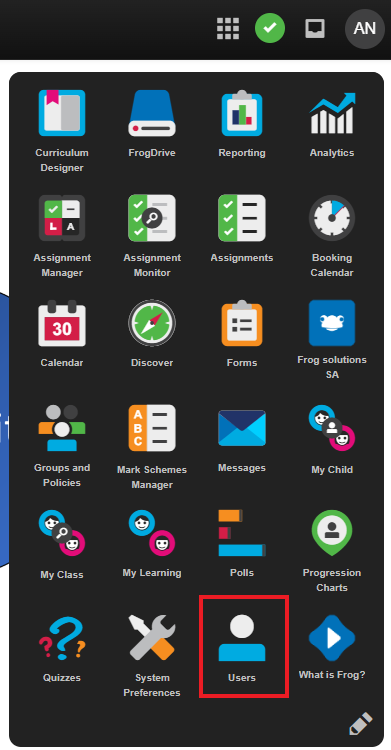
You can access the application through the Quick launch menu or through FrogDrive and then selecting the application in the vertical menu.
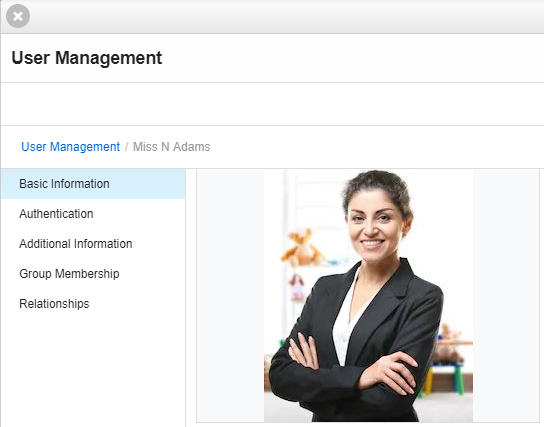
When the app opens, the window below will show, displaying all users in your Frog environment:
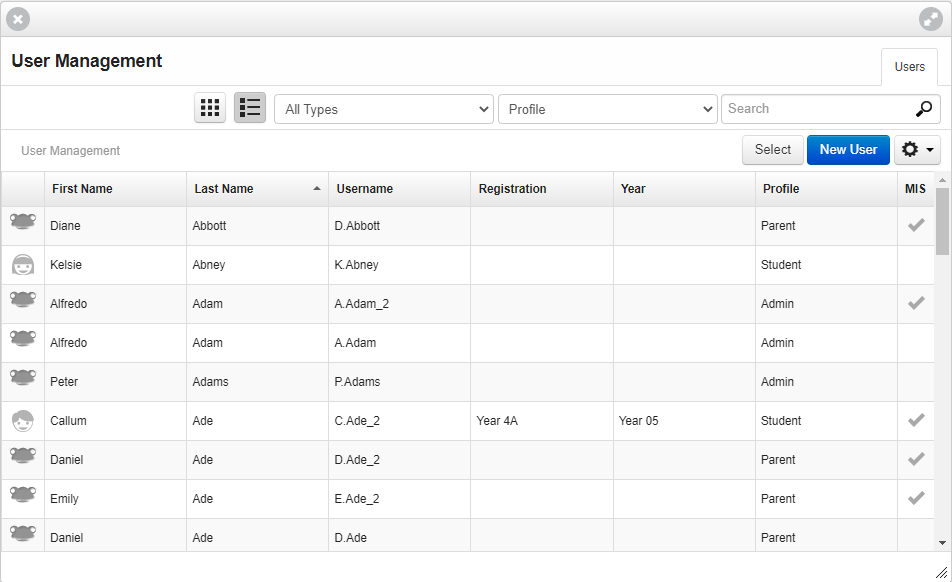
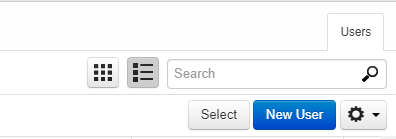
This window allows you to:
- Change the view of all users between a list view or a grid view
- Scroll through all users and select one by selecting it
- Filter the list by
- Type (user accounts that exist in the EMS or only in Frog - 'MIS' or 'Not MIS')
- Profile (Admin, Staff, Student, Parent, etc)
- Search for a specific user by typing in their name or other information
- Add a new user to Frog
- Change to Select mode to select multiple users
- Access additional settings by selecting the Action cog
- Expand the window to fill your screen by selecting the diagonal arrows in the top right-hand corner
- Close the window by selecting the X in the top left-hand corner.
Searching for users
To search for users in the Users, app enter a term in the search box at the top right of the app.

Once you have entered three characters or more the user list will begin to filter based on your search term.
You can sort your results alphanumerically by selecting a column header if necessary. If you want to select multiple users to perform bulk actions, you need to use the Select button in the top right hand corner of your results table and then highlight the users.
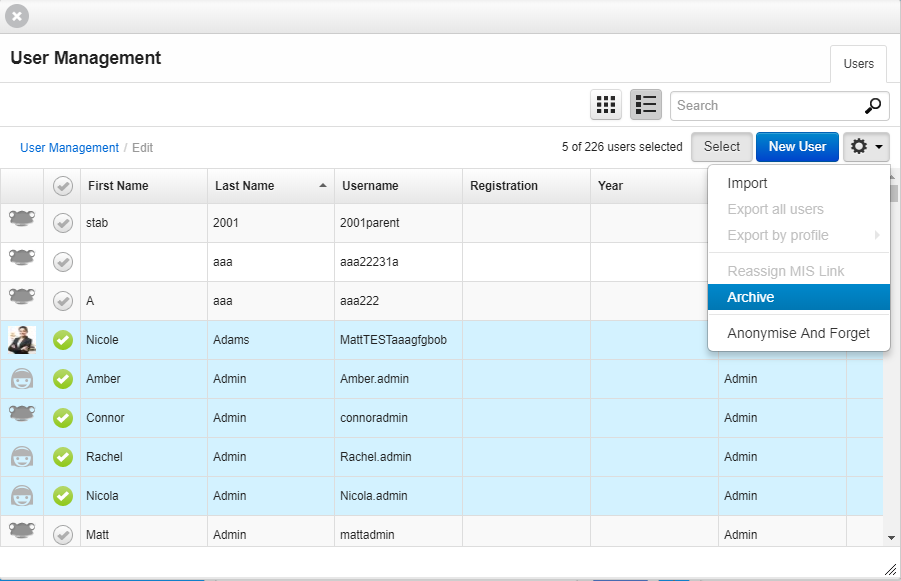
Selecting multiple users
When in the Users application, you can select multiple users if you want to make any bulk changes. This is mainly used for archiving users in bulk. If you want to select multiple users to perform bulk actions, you need to use the Select button in the top right hand corner of your results table.
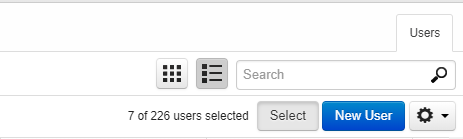
From here, you need to highlight the users you want to make the changes to.

Login as user
It is possible to impersonate a user in Frog, by utilising the Login is user function found within the Users application > User management. Access to this feature is management in Groups & policies. It is important to note that this feature will only work once a user has successfully authenticated into a site's Frog environment. Until then, the Login user feature will not appear.
Managing Basic Information
Viewing user details
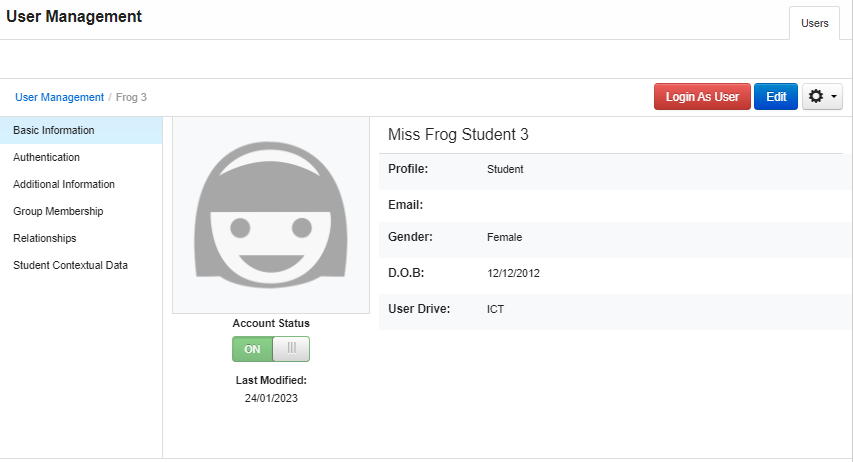
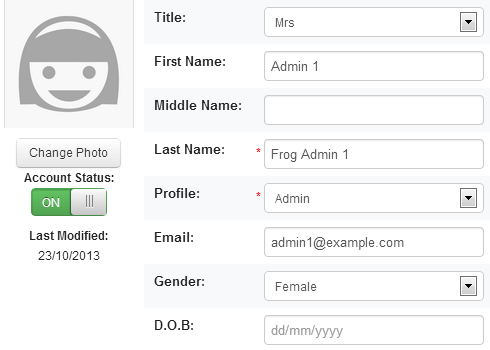
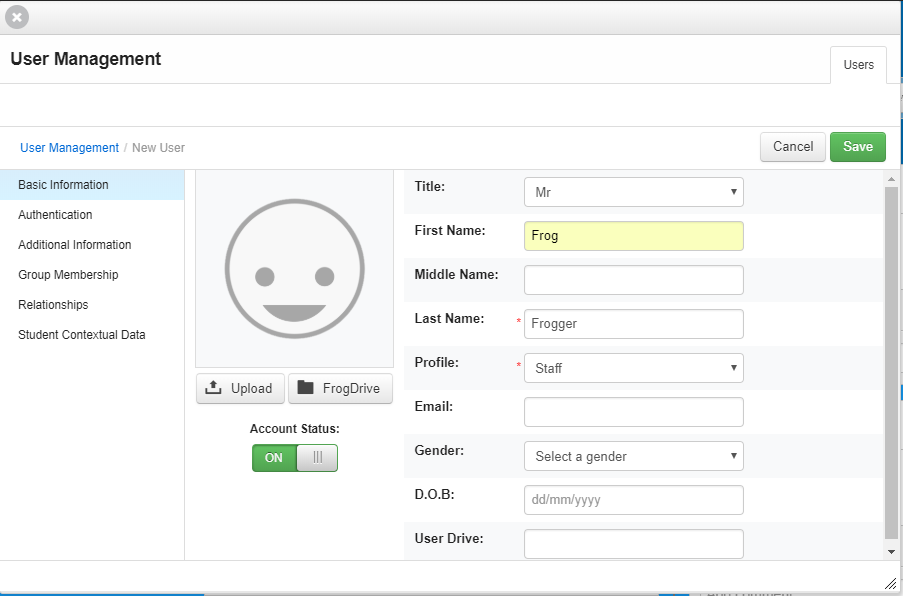
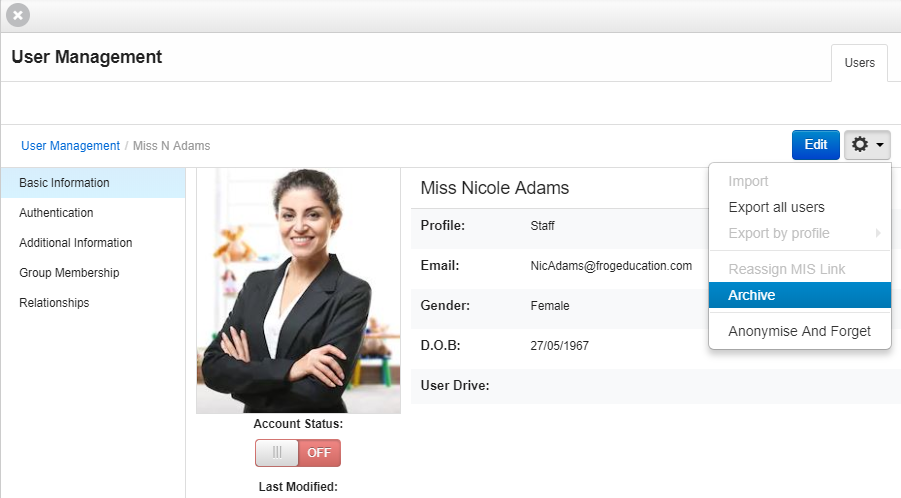
To view the details for a specific user select their row in the user listing. The user details pages will now be displayed, initially showing the basic information category.
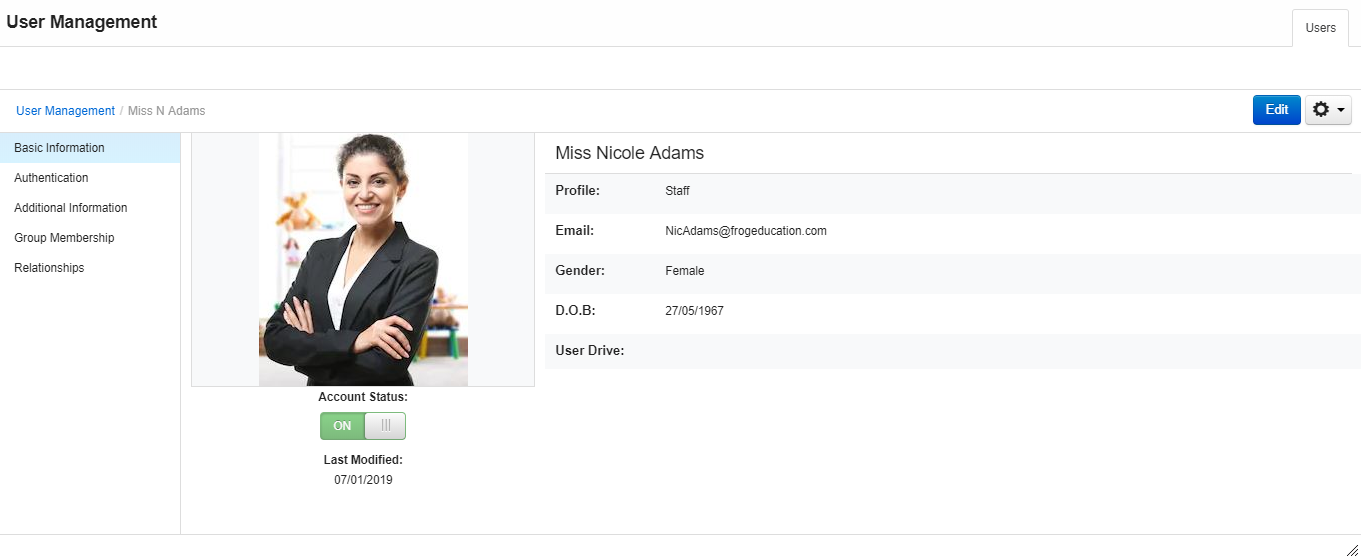
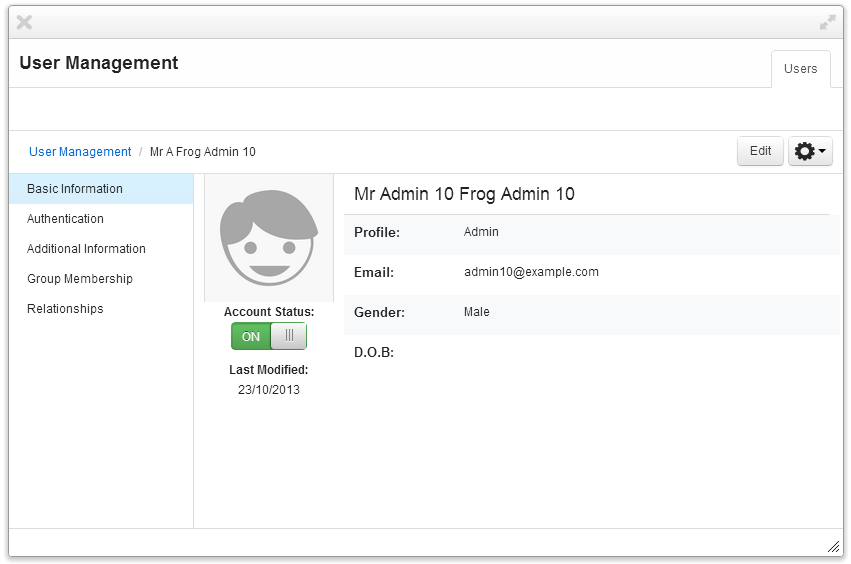
The basic information category displays a user's full name, including:
- Title
- Profile
- Email address
- Gender
- Date of birth
- Profile picture
- Accounts status
- Date on which their account was last modified.
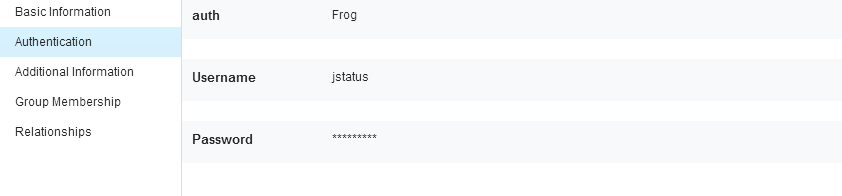
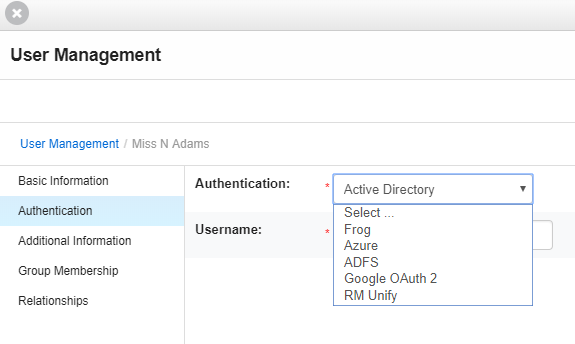
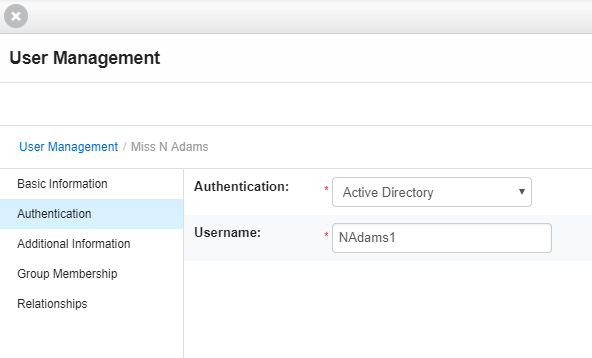
The authentication category displays the user's authentication type, detailing the name of the system that the user authenticates against as well as the user's username. The 'Frog' authentication type means that the user would log in directly with a username and password into Frog. ADFS means that the account uses single sign on (SSO) and their log in is managed by EdPass.
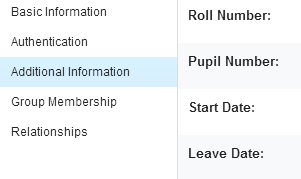
The additional information page shows further information related to the user. This includes information on the user's unique identifiers as well as as their start and end dates.
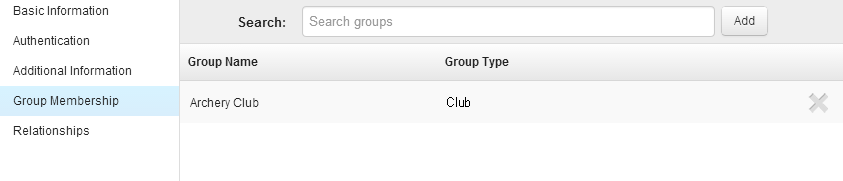
The group membership page allows you to quickly see the groups a user is a member of. The groups list can be sorted by selecting the column headers. You can add a user to a group through this interface.
Editing a user
Note: It is not recommended that you edit these settings. Much of this data is managed by the EMS. Some changes may be overwritten by data in EMS if there is a mismatch between the two databases. Any changes made by in Frog could result in access issues for your users. The information provided below is designed to inform, rather than a guide you should be following.
To edit a user's details, select their account from the user listing and then click the Edit button from the menu bar. The details page will now change to reflect the fields that can be edited.
Any fields that are currently being populated by the MIS will not be available for editing.
Whilst in Edit mode you can switch between each of the details categories and edit the information for each.
Fields that can be edited on the basic information page, include the user's:
- Title
- Forename
- Middle name
- Surname
- The profile a user has assigned
- Gender
- Date of birth.
You can use the Change photo button to select a different photo to be used for this account's profile picture.
Managing Authentication
Under the authentication category within the user management application you can change how the user authenticates when accessing Frog.
Note: Ideally, most users will authenticate into Frog using EdPass so it is unlikely you will need to manage much of these settings. However, it can be useful to have a few local accounts for users of Frog that may not have EdPass or may not be associated with your school (e.g. relief teachers). In general, the two main setting you would use are:
ADFS - for users whose data exists in EMS and uses EdPass to authenticate into Frog - for local/generic accounts
If the user authenticates against your Active directory server, you can change the username to match what is in your AD server from within here.
Note: This can also be done for multiple users via a CSV.
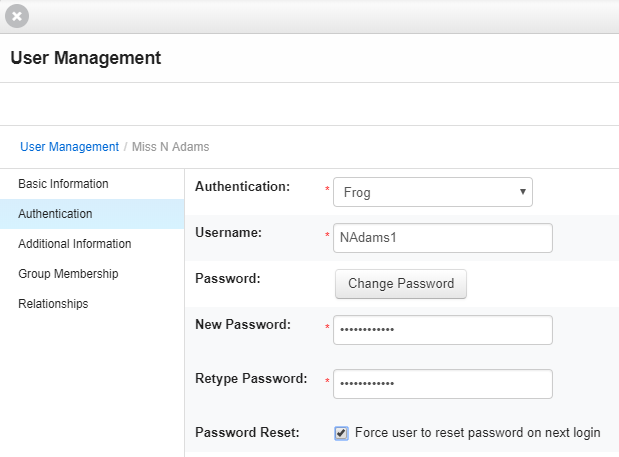
If a user authenticates via Frog, this is the area where you can change their username or password. The password must be entered twice and both entries must match. You can also force the user to change their password on their next login.
Managing Additional Information
Note: It is not recommended that you edit these settings. Much of this data is managed by the EMS. Some changes may be overwritten by data in EMS if there is a mismatch between the two databases. Any changes made by in Frog could result in access issues for your users. The information provided below is designed to inform, rather than a guide you should be following.
You can manage the additional information of a user from within the users application by searching for the user and clicking on their information and entering edit mode. From within here you can edit a pupils Roll Number, Pupil Number, Start date, Leave date and their Google ID.
Note: A student's Pupil Number is automatically filled as their EDID.
Note: If any of the fields are highlighted grey and you are unable to edit them, this is because it is displaying the users EMS information and this cannot be changed.
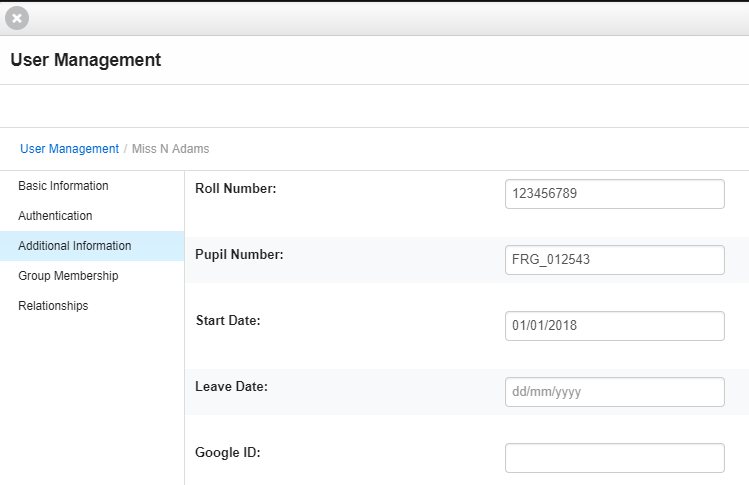
The Google ID should be the user's @schools LearnLink email and is used if your school has integrated Frog with Google Drive.
Managing Group Membership
Note: It is not recommended that you edit these settings. Much of this data is managed by the EMS. Some changes may be overwritten by data in EMS if there is a mismatch between the two databases. Any changes made by in Frog could result in access issues for your users. The information provided below is designed to inform, rather than a guide you should be following.
To add a user to a group, select the Edit button if the Users app is not in Edit mode.
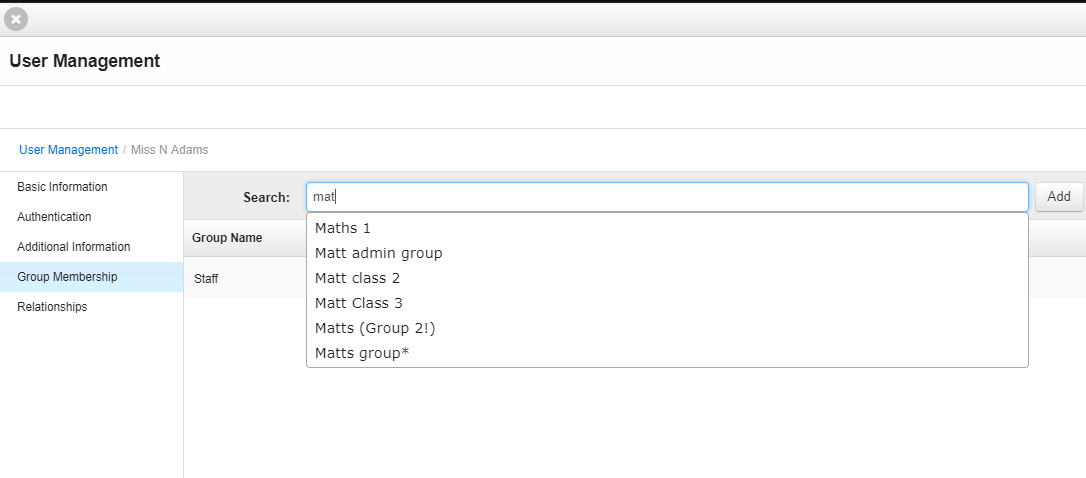
Enter the name of the group you would like to add the user to in the Search groups field.

Select the group in the drop down list of results and then select the Add button to add this user to the group.
To remove this user from a group, select the X button adjacent to the group name and type for the appropriate group.
Adding a Relationship
You can add relationships to the user by searching for another user on the platform using the Search field.
Note: It is not recommended that you edit these settings. Much of this data is managed by the EMS. Some changes may be overwritten by data in EMS if there is a mismatch between the two databases. Any changes made by in Frog could result in access issues for your users. The information provided below is designed to inform, rather than a guide you should be following.
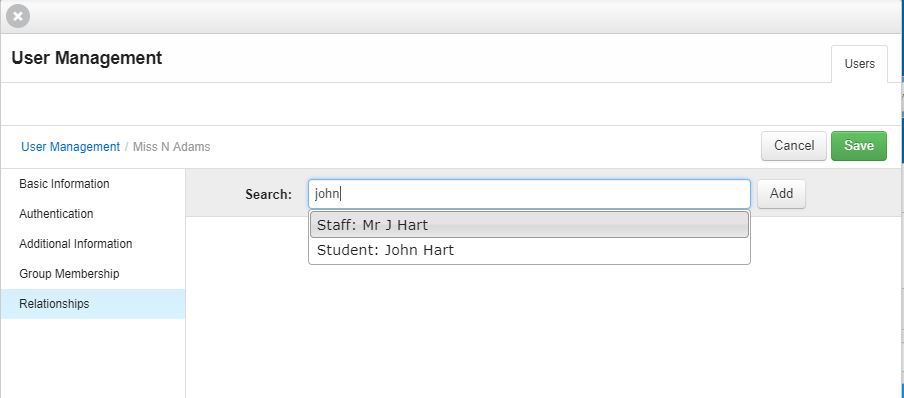

Enter the name of the user in the search field and select them from the results drop down, followed by selecting the Add button to create the relationship.

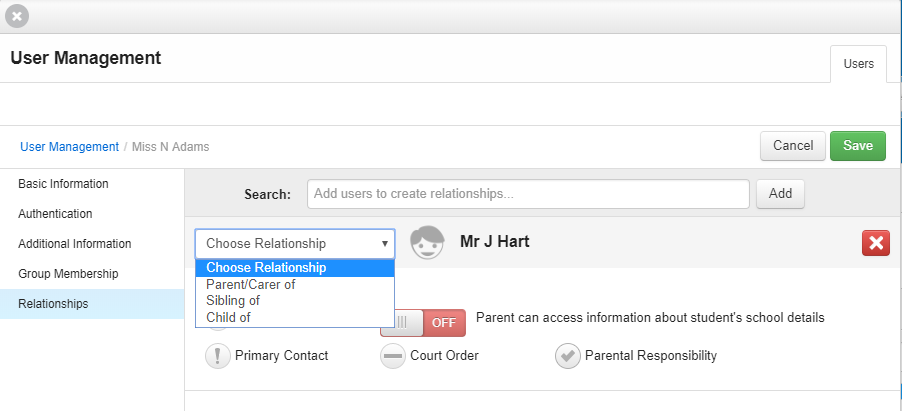
The relationship to the user has now been created however you must now specify the Relationship type from the drop down menu.
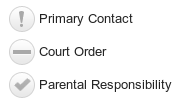
Selecting the Parent of relationship type allows you to flag this user as the primary contact for another user, having parental responsibility over another user or having a court order relating to another user.
To toggle these items select the image located next to the item title.
When adding relationships, the user being edited holds the selected relationship type over the user being added into the relationship section. For example, if User 1 is being edited and User 2 is being added to the relationships' page with a type ‘Parent/Carer’, then User 1 is being declared as the Parent/Carer of User 2.
To return to the User listing select the User management link from the breadcrumb trail.
Manually Creating a New User
New users can be created manually if necessary. This may be useful when setting up some generic/local accounts for staff such as a TRT. To create a new user select the New user button.
The user details can now be completed. Any fields marked with * are compulsory and must contain data.
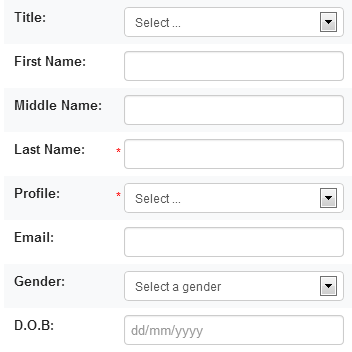
Complete the Basic information details page, and then select the Authentication page from the left hand menu.
Complete the details for the user, again ensuring that any required fields are populated.
Once the Basic information and Authentication pages have been completed you can select Save to create the new user account.
Alternatively you can continue to add further details to the account by completing the Additional information, Group membership and Relationships pages, again using the Save button to finalise account creation.
Import/Export User Profiles
Exporting users
The ability to import and export users from Frog gives you the ability to make changes to users in bulk quickly via a CSV file. You can export all users or you can export individual profiles from within the Users application. This could be useful when filling in fields such as Google ID to associate user accounts with @schools Google accounts during the Google integration process with Frog.
To export your users:
- Log into the platform as an administrator
- Navigate to the Users application
- Select the Action cog in the top right and select Export.
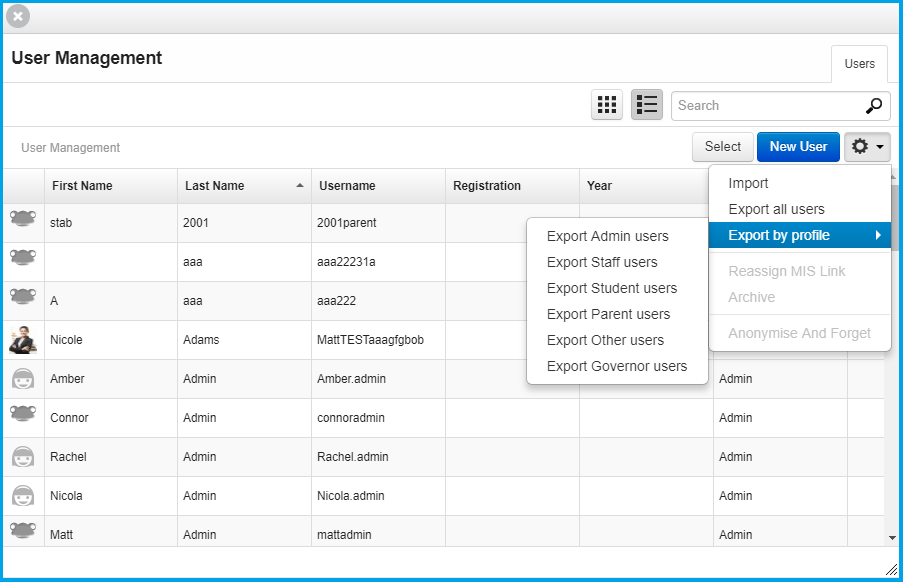
This will start a download of all the users on your platform to a CSV file.
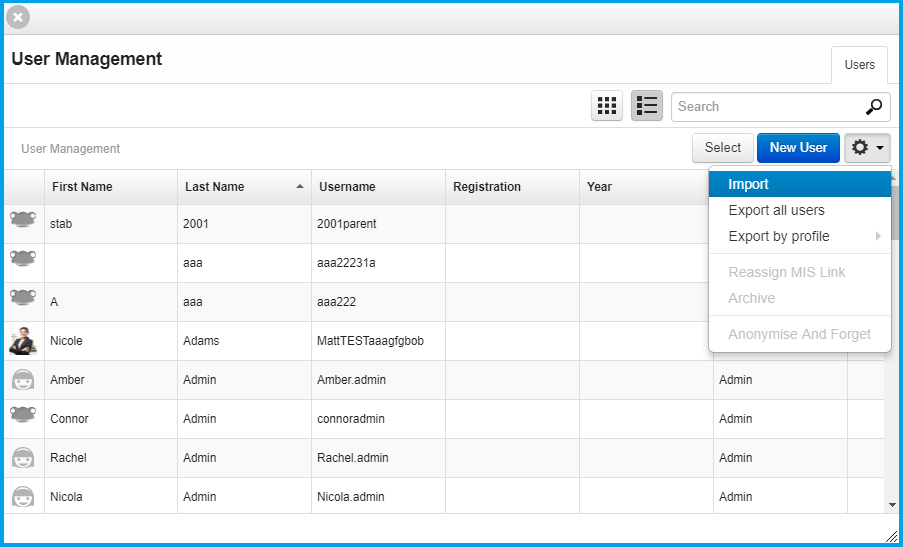
Importing users
If you want to import users and any updated information to Frog, you will need to select the Import button from the Action cog found within the Users application.
Note: When importing to Frog, you cannot override any information that is being pulled from the EMS.
A pop-up will appear and you will need to select the Upload option, select a file and ensure it is in in the CSV format.
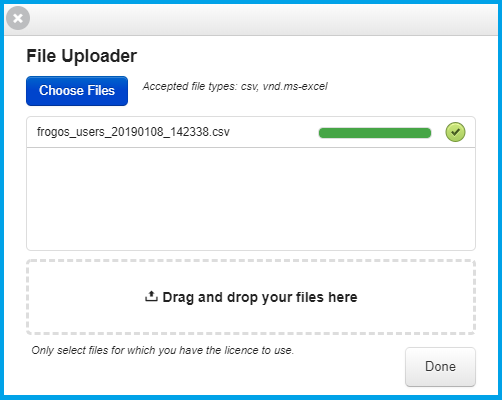
Frog will check the file is in the correct format and if so, a green tick will appear and you can select the Done button found at the bottom of the window.
You should then see a green tick and an 'Upload successful' message on stage one of the CSV import process.
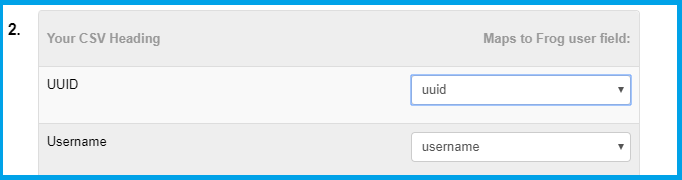
From here you can map your CSV headings to match what the user fields in Frog. This means you don't have to create new or edit existing documentation you have when importing to Frog. You could also pull information directly from your MIS database and import it, without having to edit all the headers.

Once you're happy with all of the headers, you will need to press the Validate button on step 3 of this process.

You may see some warning errors which will likely be due to missing information (like passwords or d.o.b) and these warnings are simply saying that these fields will not be updated. At this stage, you are checking to ensure the validation has been successful and that all users can be imported.
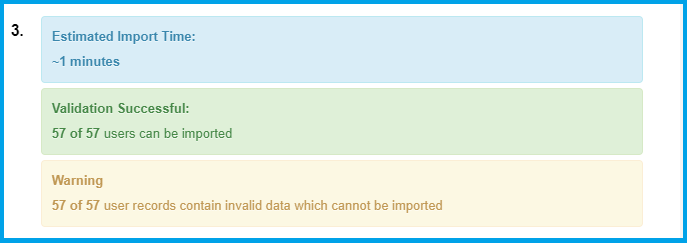
If you would like further information on the warnings, you can download the error logs.

If you are happy and want to proceed, pressing the Import users button will start the import to Frog. Once completed, it is advisable to check all the information has updated.
Other Features
Note: The following features are not recommended to be used by schools. The information below is simply designed to inform.
Activating and Deactivating users
To deactivate a user account and prevent the user from logging into the platform, select their account from the user list.
Select the Edit option to place the account in Edit mode.
Locate the Account status toggle on the basic information view.
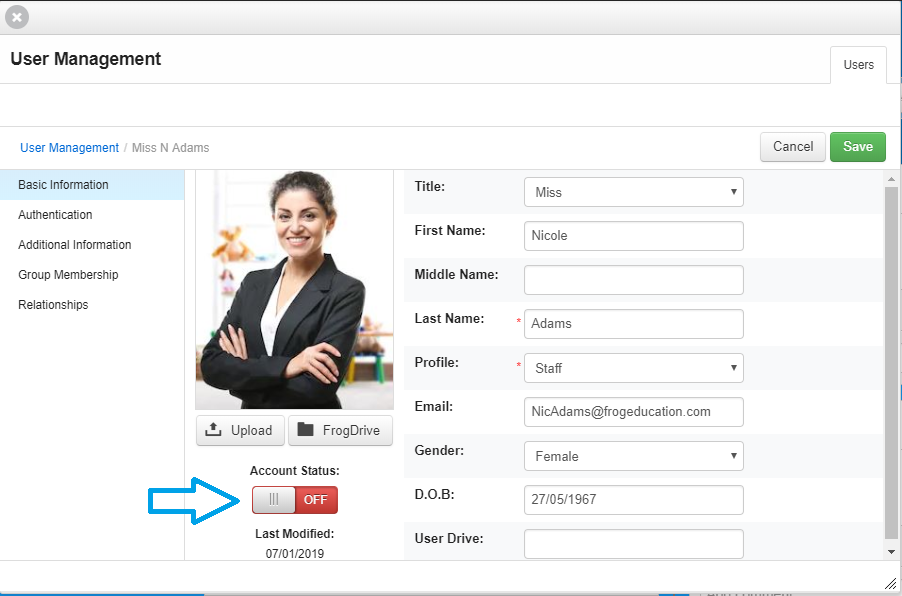
To deactivate the account set the toggle to off.
To reactivate the account set the toggle to on.
Anonymise and forget
Inside the Users application there is a option under the Action cog for Anonymise and forget. This functionality performs a 'hard delete' of data, this cannot be managed by school users.
Archiving a user
To archive a user account select the account from the user listing and then select the Actions cog, followed by the Archive option.
To archive multiple accounts use the multiple Select mode option, select the users and then from within the Action cog select Archive.
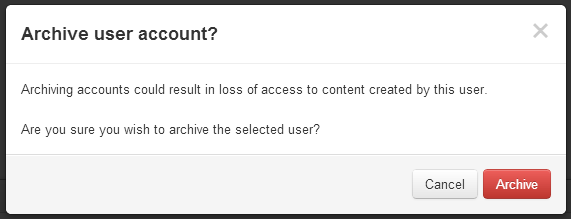
You will be prompted to confirm this action.
Re-assigning MIS links
A user’s MIS link connects their account on the FrogOS platform to the MIS data imported for a person from the MIS itself.
In some circumstances you may wish to move the MIS link from one user account to another. This may be so that users with an administrator account on the FrogOS platform can also access their MIS data, but their administrator account was created manually rather than via the MIS import process.
The process for reassigning an MIS link is carried out through the Users app.
Launch the Users app from the Applications category of FrogDrive followed by searching for the user currently holding the MIS link you wish to move.
Select the user from the list of returned results to view their account details. To begin reassigning the MIS link select the Actions cog, followed by the Reassign MIS link option.
The Reassign MIS link modal will now be displayed. This modal contains 3 key areas:
- The first confirms who the MIS link will be removed from
- The second allows you to search for a user to move the MIS link to
- The third section contains suggestions to move the MIS link to based on the user’s UPN, roll number and name.
If none of the suggestions are the user you wish to move the link to enter a name in the Assign to search field to locate the correct user.
Select the user from the list of returned results or from the Suggestions area and then select the Save & reassign button.
Before selecting the Save & reassign button you can change the user to be given the MIS link by selecting the cross icon to deselect the user.
When the Save & reassign button is selected you will be prompted to confirm the action. To cancel the MIS link change select the Cancel button at any point during the process to close the Reassign MIS modal without saving your changes.