Back to All Guides
GET IN TOUCH
If you would like to get further information about Frog or help in getting it set up in your school please get in touch via the contact details below...
hello@frogeducation.com
Groups & Policies
Using the Groups & policies application, functionality across Frog can be enabled and disabled for all users.
About Groups & Policies
The Groups & policies app allows the management and creation of groups as well as controlling the policies that determine the access and roles a group has. This means you can place restrictions on certain profiles or groups, as well as grant further permissions to others. The Groups & policies app consists of three areas:
- Manage
- Troubleshoot
- Audit log.
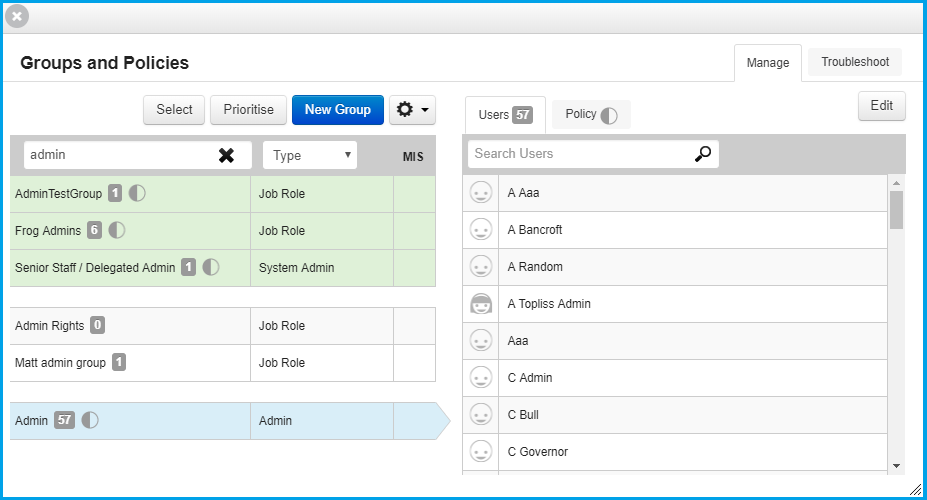
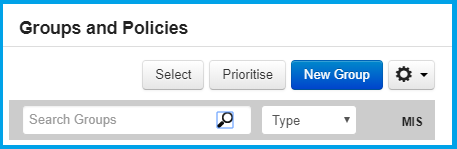
Once launched, the app will display the overview of groups on the system. The groups list can be filtered by group type and searched using the search bar. The Action cog allows you to edit, duplicate or delete a selected group.
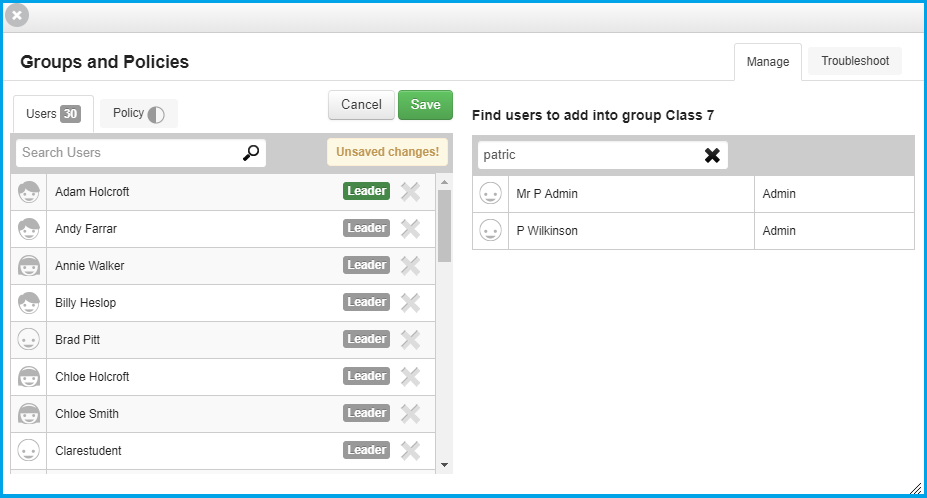
Add/Remove Users from a Group
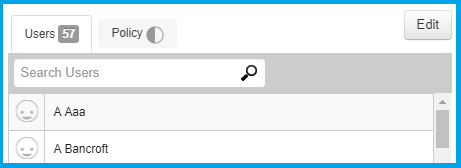
Group membership management is carried out under the Users tab of a particular groups details. Once you have searched for and selected the group you wish to edit, you can check all the users by selecting the Users tab on the right hand side. The search bar can be used to find individuals quickly.

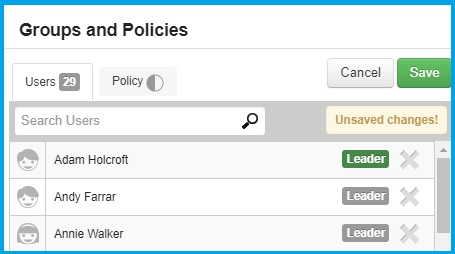
To edit group membership select the Edit button located in the top right of the group details pane.
Group members can be removed by selecting their respective X button.
A group member can be made into a leader of the group by selecting the Leader toggle.
If a group member is already a group leader, the leader toggle will be highlighted.
Users within the group can be searched using the search bar.
To add more members to the group, use the search bar located in the right hand pane to locate users of the platform.
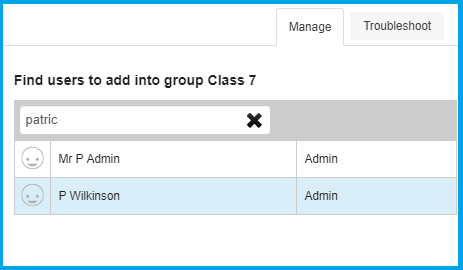
To add a user, all you need to do is select their name from the returned search results.
To save any changes, select the Save button.
Create a New Group
To create a new group, open the Groups & policies application and select the New group button.
Enter a group name and a group type in the dialog displayed.
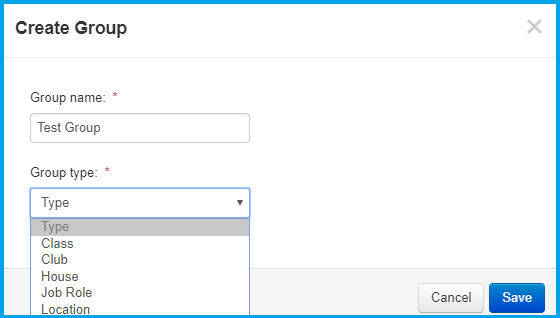
Once you have entered these details select the Save button to create the group. From here, you're ready to start adding users and specifying what policies this group will have.
Managing Group Policies
Policy groups use roles to dictate whether members of the group have any increased or reduced access to functionality in the platform. This may be to restrict the ability to open a particular app or to use a particular function of an app. Roles can also be used to restrict which widgets are available to users when building sites.
To edit a groups roles, select the Edit button while a group is selected, followed by the Policy tab.
The details pane will now display the Apps and Widgets headings, all roles on the platform fall into one of these two categories.
Each category can be expanded by selecting it. Role subcategories are then displayed.
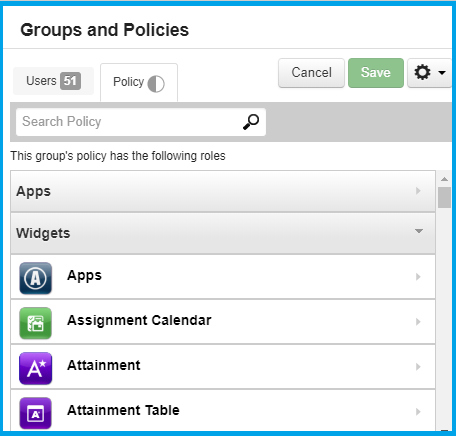
Each subcategory can then be expanded to show the available roles for the Widget or App. Each role override can be activated using the check box and then enabled or disabled using the toggle provided. If you wish to see further details on the functionality granted by a given role, select the information button marked with a question mark on the right hand side of each row.
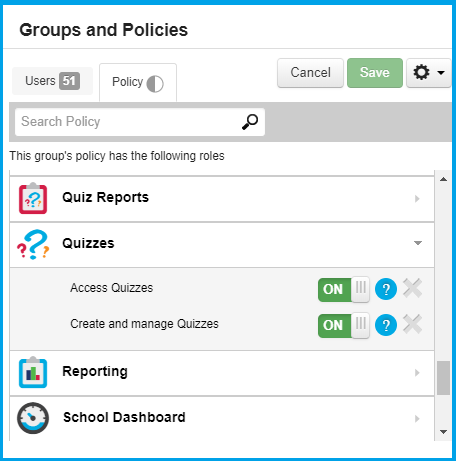
To locate a specific role more easily, enter the name of the role in the search bar at the top of the role list within the details pane.
To add more policies to a group, you can select them from the right hand side of this window and then choose which roles you want to add by selecting the + button.
When you're happy, ensure you select the Save button to apply any changes made.
Managing Policy Priority
As it is possible for a user to be a member of several groups, policy groups must be given a priority so that the correct policies can be applied to their account.
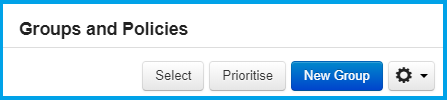
To manage policy group priorities, select the Prioritise button from the Groups view.
The group list will now change to display a list of the policy groups on the platform.
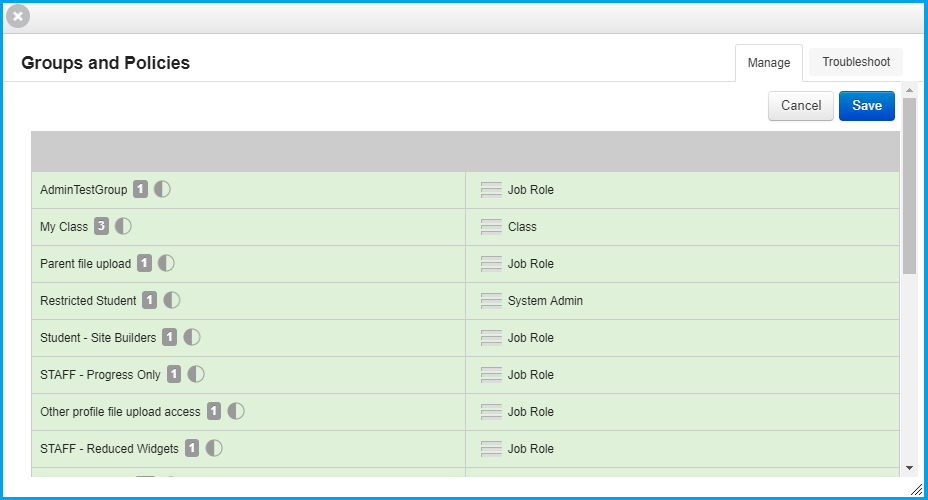
Policy group priority is controlled by ranking the groups vertically. Policy groups at the top of the group list will have precedence over the groups below them.
To re-prioritise policy groups simply drag a group up or down the priority list using the grab handle on the groups row.
Once you have reordered the policy groups, select the View changes option from the details pane to review the actual changes that have been made to system policies.
Troubleshooting Policies
The Troubleshoot tab of the Groups & policies app allows you to easily determine what access a user has to platform functionality as well as detailing which group or groups is providing this access. From within the Groups & policies application, the troubleshoot tab can be found in the top right hand corner of the window.
To view the policies in effect for a given user, search for the user using the search bar in the left pane.
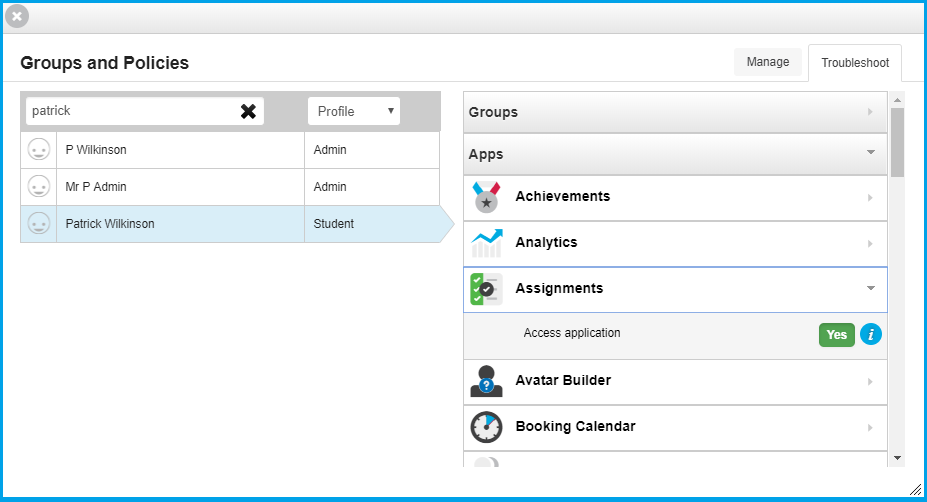
The details pane will now display the:
- Groups
- Apps
- Widgets sections.
Expand the groups section to see a list of groups the user is a member of or expand either the Apps or Widget sections to view the details of any policies that are applied to the user.