












Back to All Guides
GET IN TOUCH
If you would like to get further information about Frog or help in getting it set up in your school please get in touch via the contact details below...
hello@frogeducation.com
Site
Creating new sites can be done easily using Frog.
Creating a Frog Site
You can create a new Frog site by selecting the blue + button on the Frog bar.
Alternatively, you can create a Frog site using the Site creation wizard. To open the Site creation wizard and start making your new site, select the New site button from within the FrogDrive > Sites.
 |
Deleting a Frog site
Deleting a Frog site will delete the whole site, all pages and all assets attached to the site. You are only able to delete a Frog site that you own. Please be aware that you will not be able to recover the Frog site once you delete it.
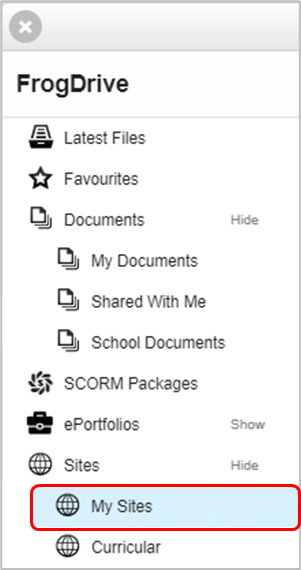
- Locate the Frog site you wish to delete by opening FrogDrive and selecting My sites.
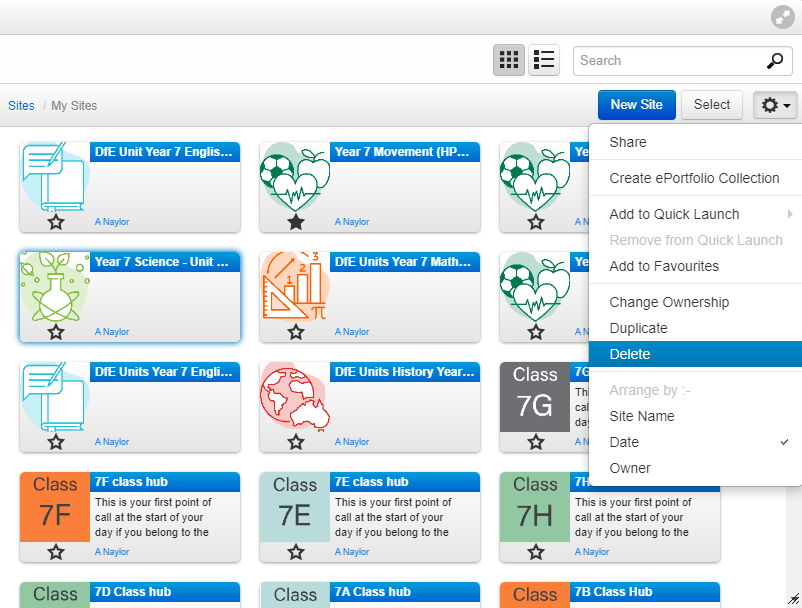
- Select the Frog site and a small blue outline should appear around the selected Frog site
- Select the Action cog
- Select delete
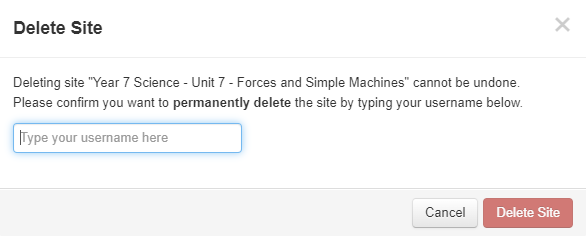
- Frog will prompt you to enter your username to confirm deleting the Frog site.
Your Frog username is the first letter of your first name followed by a period then your last name (surname). For example, if your name was Jane Smith, your Frog username would be 'J.Smith'.
Templates
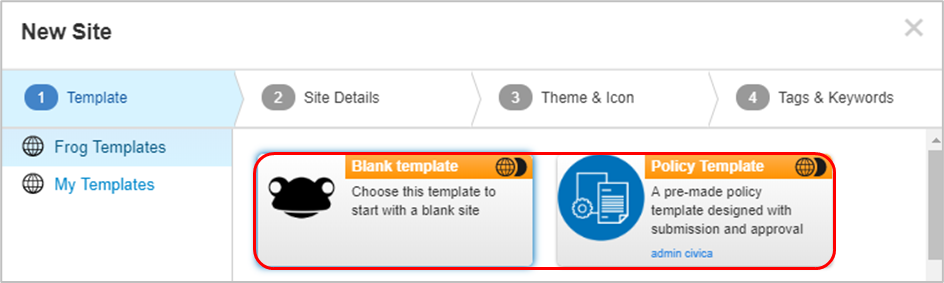
The first step in the Frog site creation process is to choose a template to base your new Frog site on.
Templates can be defined by your preschool/school and you may have several to choose from. As a Frog site can be used for any number of purposes you may see templates for:
- Curricular sites
- Extra-curricular activities
- Websites
- School events.
Site Details
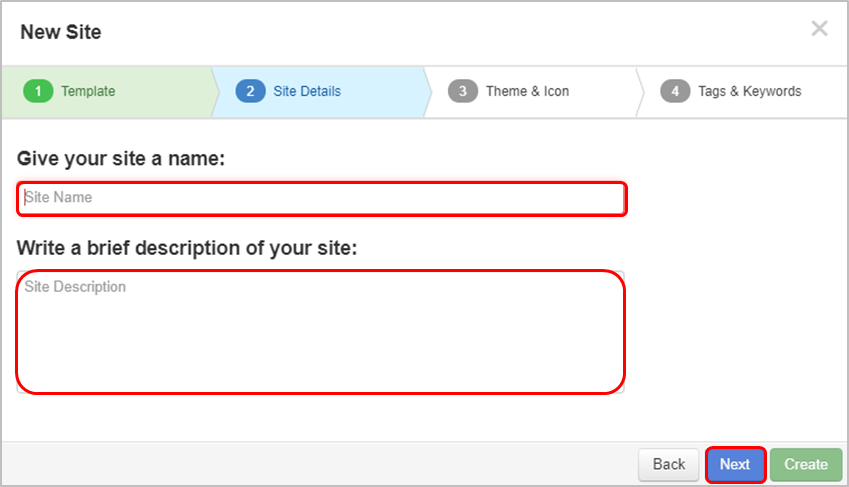
Once you have chosen a template you can name your Frog site and give it a description. All Frog sites must have a name whereas descriptions are optional. Enter the name for your Frog site in the Site name field. If you would like to give your site a description, enter this in the Site description field. These items can be updated at any time should you change your mind in the future.
Theme & Icon
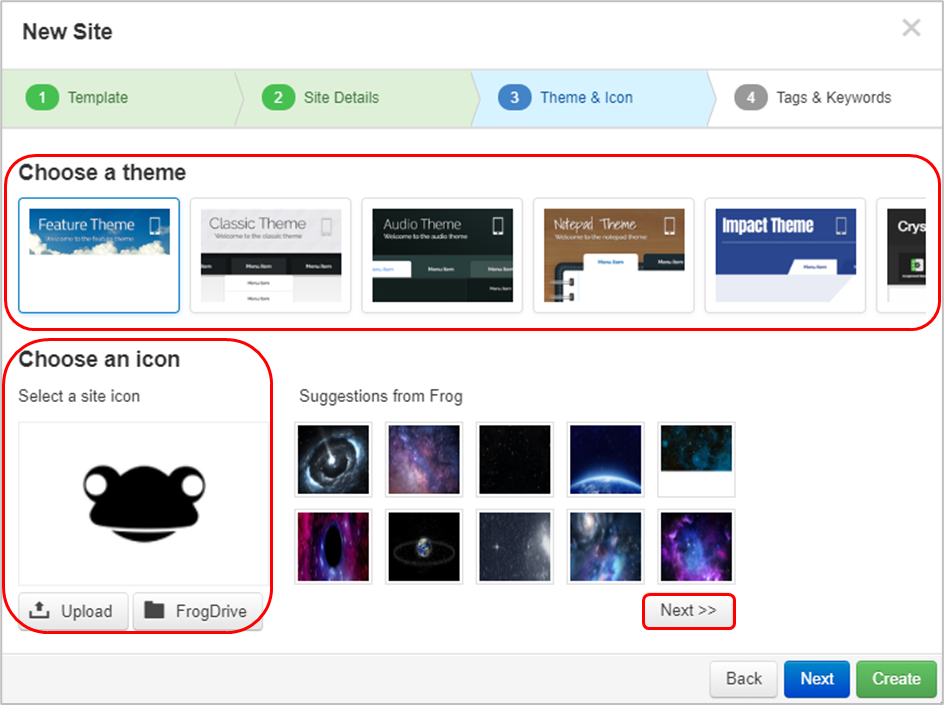
If you wish to continue customising your Frog site you can now select a theme & icon. The theme of your Frog site controls its look and feel. There are a number of themes to choose from.
You can also now select an icon for your Frog site. The default Frog icon will already be visible in the preview area. You can upload an image from your desktop or device with the Upload button. If you already have an image you wish to use in your FrogDrive, you can select the FrogDrive button to import an item. If you do not have an icon to use the Site creation wizard provides some suggestions, based on the Frog site name.
Tags & Keywords
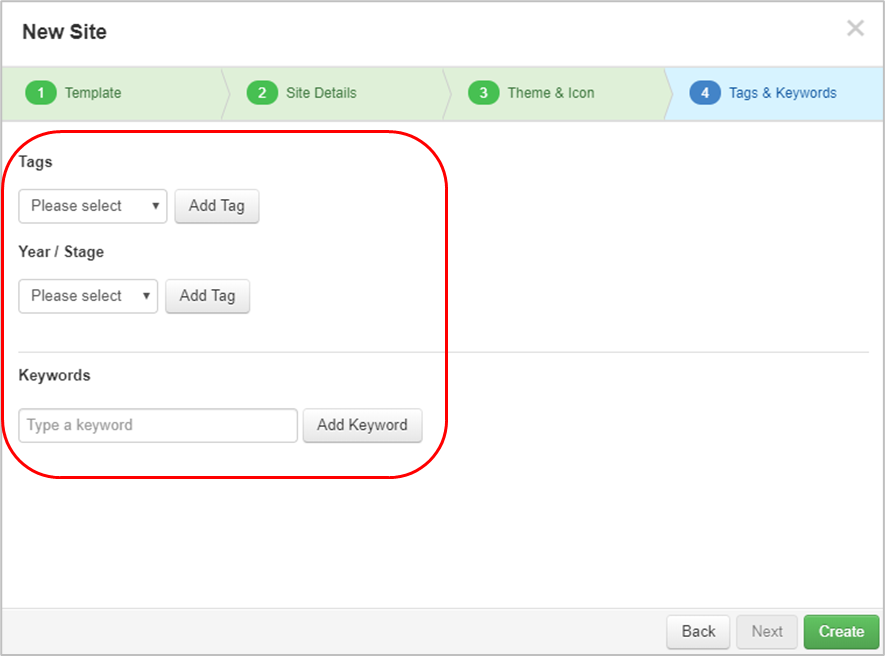
You may now add Tags to your site. Tags allow the Frog site to be located more easily in FrogDrive or through the Global search.
To add a tag, select the primary category for your tag from the drop down menu. These include:
- Curricular
- Extra-curricular
- Pastoral.
Once a primary tag has been selected a second option filled with subjects will be displayed to allow you to further tag your Frog site. If you wish to tag your Frog site with only the primary category, select the Add tag button before selecting a sub-category tag. If you wish to add both a primary and sub-category tag select both of these before choosing the Add tag button.
A Frog site can also be tagged with a Year/Stage. Select the Year/Stage drop down menu and choose the relevant Year/Stage.
If you wish to use custom tags, you can add Keywords to your Frog site using the Keywords field. Specify a single keyword and then select the Add keyword button. If you wish to return to earlier steps of the wizard to change the settings you have chosen select the Back button. If you are happy with your choices select the Create button to finish the wizard and view your new Frog site.
Site Settings
In Site Settings you have a number of options for editing or managing a Frog site. The options are:
- Name of Site - You can edit the name of your Frog site
- Site Description - You can add a description for your Frog site
- Display Mode - You can toggle on and off how you display your Frog site. Site displays like a website and Presentation displays yours pages in a sequence
- Theme - Allows you to change the theme of your Frog site
- Background - Allows you to change the background and background style of your Frog site
- Site Icon - Allows you to change the icon of your Frog site
- Tags, Year & Stage - Allows you to add tags for:
- Curricular
- Extra-curricular
- Pastoral
- Year
- Stage
- Keywords - Allows you to add customisable keywords
- Save as Template - Allows you save your Frog site as a template for others to use
- Display Site Breadcrumbs - Allows you to display the page navigation of your Frog site.
Page Settings
In Page settings you have a number of options for editing or managing a page within your Frog site. The options are:
- Page Name - You can edit the name of your Frog site
- Layout - You can change the layout of your page
- Link to this Page - Provides the URL for a link to that page within your Frog site
- Display Page in Menu - Allows you to toggle on or off the page menu
- Set Page Theme - Allows you to manage the theme of the page
- Set Page Background - Allows you to manage the page background
- Set Page Icon - Allows you to manage the icon of that page
- Delete Page - Allows you to delete the page.
Page Layout Styles
To add style to your Frog sites, the layout boxes come with a style function.
To choose a style select the blue Style button located at the top left of your layout box.
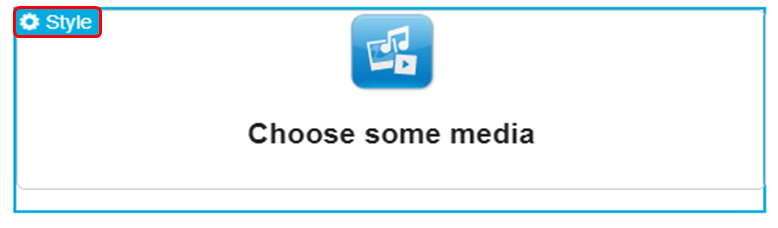
Once selected you will see the Edit panel on the left hand side change to Box settings. Choose a style from the options that drop down.
Select Save changes and view your changes.
Custom styles
You can create a custom style for any of the layout boxes. Select custom and you have several options become available for you to customise a layout box.
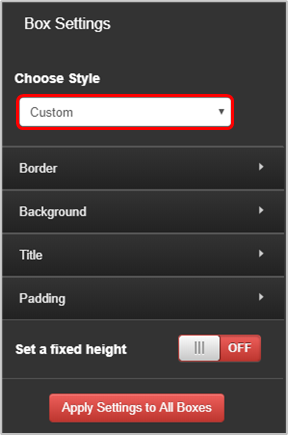
Apply settings to all boxes
You can choose to apply your style to all boxes by selecting the Apply settings to all boxes button.

Site Rules
Initially new pages and widgets are visible to anyone that the site is shared to. Using Rules, it is possible to hide pages and widgets making them only visible to certain people and/or on certain dates. When in Edit mode, all pages and widgets will be displayed regardless of any rule. A cog indicator will appear against any pages or widgets that have rules applied, so that users with Edit & manage permission are aware of the rule.
To add a Hide or Show rule, select the page or widget and then select Rules in the Settings panel. The initial state of the page or widget is defined by the slide shown in the panel. The slider toggles the page or widget to:
- Hide - Remain hidden until conditions of the rules are met
- Show - Remain visible until conditions of the rules are met.
Adding a single rule
You can now choose to add a condition by selecting the Add rule button.
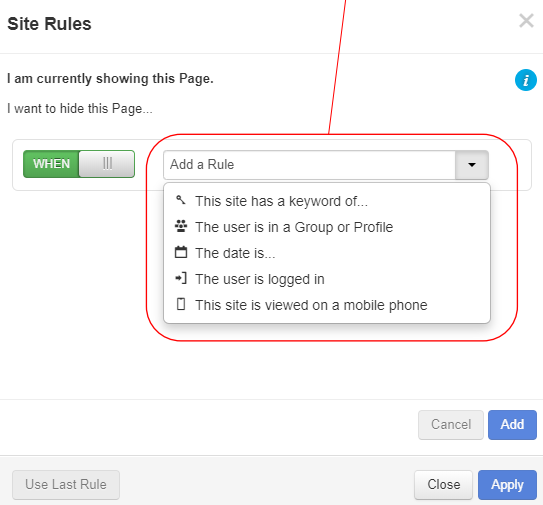
This is where you define the condition for the rule. Set the slider to set the first part of the condition.
This toggles between:
- When - Met only when the next part of condition is true
- Unless - The condition is met unless the next part of the rule is true.
From the Add a rule drop down menu, you can select to add a rule specifying either a user/group or date. Selecting User is in a group or profile allows you only to show a page or widget to a particular profile type or group. Selecting the date allows you to specify when to show a page or widget. After or before a specified date, between certain dates or only on a specific day can be specified.
Select Apply to add the Rule. The Rule will be shown in the Rules settings panel.
Multiple rules
Multiple rules can be applied. These are categorised into And and Or:
- And rules - Adding another rule in Site rules will mean that the first rule 'And' the second rule has to be true before the condition is met. Multiple rules can be added here, each being linked with the 'And' rule. Selecting Apply will add the rules to the Rules settings panel
- Or rules - Each time a new Rule is created, it is added to the Rules settings panel (the most recent displayed to the top) and is joined to the previously added rule with an 'Or'.
Copy last rule
If a rule is used frequently or applied to multiple pages or widgets, you can use the Use last rule button to use that last saved rule on your site.
Edit a rule
To edit a rule in the Rules settings panel, select the Edit (pencil) icon.
Delete a rule
To delete a rule in the Rules settings panel select the x icon.
Note: Holding down the Ctrl key at the same time as selecting x will delete the Rule without displaying the Are you sure? message.
To delete a rule in the Site rules, select the x.
Assignments with rules
Care must be taken when sites containing Rules are used for assigning work. Consideration must be taken into account for any users that may not be able to see activities due to rules placed on a page or widget.
The Assignment manager and Assignment monitor will display assignment activities against a pupil’s name as not completed even if they were unable to access the work.