










Back to All Guides
GET IN TOUCH
If you would like to get further information about Frog or help in getting it set up in your school please get in touch via the contact details below...
hello@frogeducation.com
User Timeline
Your User Timeline contains a list of events that have taken place within Frog that are related to you.
Managing Items on a Timeline
The User timeline contains a list of events that have taken place within Frog that are related to you. The User timeline can include entries such as:
- Files uploaded to the timeline by you
- Files sent to you by other users
- Assignments sent to you
- Site shared with you by other users
- Notifications sent to you
- Calendar events you have been invited to.
You can access your timeline by either choosing the Frog icon on the top left of your Frog bar, or toggling to the correct dashboard using the toggle function with white dots.
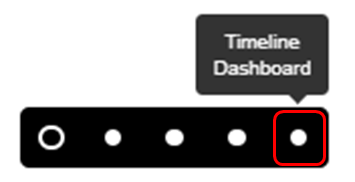 |
Parents will be able to see their child’s learning shared on their own timeline. You can find your own timeline by selecting through the Dashboard selector from the bottom of the dashboards page.
Hide from timeline
There may be times when you wish to remove some items from view without deleting it from your timeline in order to make the timeline easier to read. This can be achieved by hiding items on the timeline.
To hide an item on the timeline select the Action cog for that item.
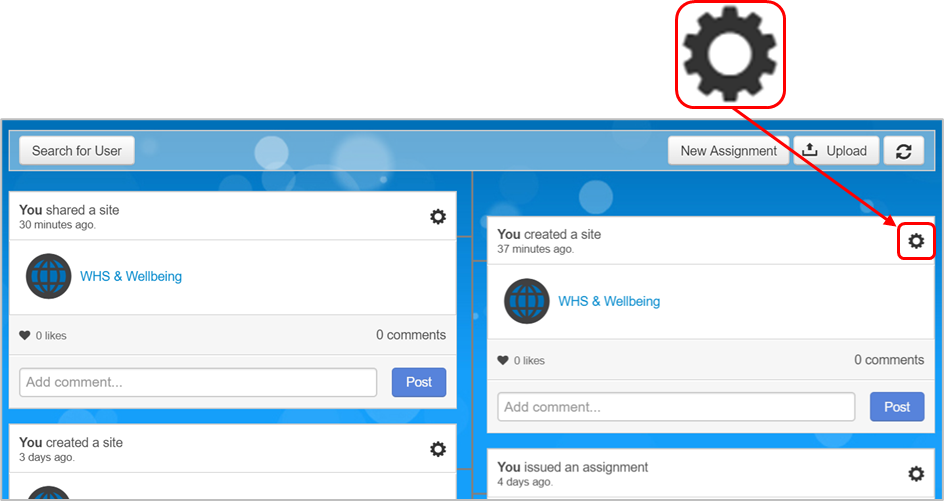 |
Then select the Hide from timeline option.
Once an event has been hidden, its place in the timeline is retained and the item can be revealed again by selecting the Event hidden - undo? option.
Adding a comment
You can comment on an item in the timeline by typing in the Add comment… box and selecting Post.
The comment will always appear in your own timeline, however if the owner of the Frog site has chosen to do so, it may require approval before it is shown to others.
Adding likes
Liking an item on a timeline allows you to provide positive feedback to a user that has shared something with you.
To like an item on a timeline select the Like button for the appropriate timeline entry.
Once you have liked an item the Like button will become highlighted to represent this.
To undo this action simply select the Like button again.
Deleting an item
You can delete any items that you have added to your own timeline.
Events added by other users, such as assignments or calendar events, cannot be deleted from the timeline, though these items can be hidden.
To delete an item from the timeline select the Action cog for the item, then select Delete.
Uploading Files
Images, videos, audio files and other files can be uploaded to your timeline.
You might want to upload items to your timeline to record work that you have done or other curricular or extracurricular achievements.
When an item is added to your timeline it is stored in your FrogDrive, including those sent to you by other users.
If you upload an item to your FrogDrive, it will also be displayed in your timeline.
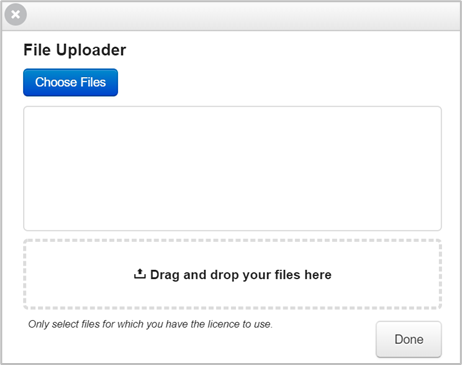
To add an item to the timeline select the Upload button to launch the File uploader.
Sharing Files
Items that have been uploaded to the timeline can be shared with other users.
Items that have been uploaded to the FrogDrive can also be shared with other users’ timelines.
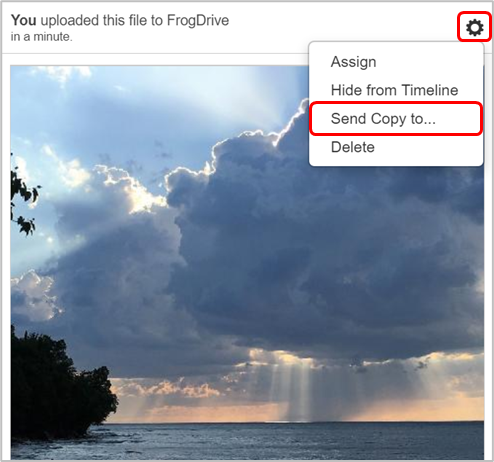
To share an item on the timeline select the Action cog for that item and then select Send copy to....
 |
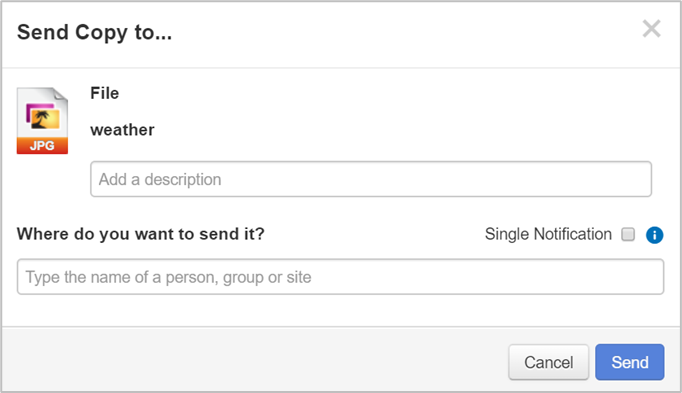
Enter a description for the item if required, then enter the name of the Frog site, user or group that you wish to share the item with into the search bar. Select the required Frog site, user or group from the dropdown list results. Once all recipients are added, select the Send button to send a copy.
 |
Assigning an Item
Resources in your timeline can be assigned to users as pieces of work.
These assignments can be tracked in the Assignment Manager application as well as having an activity added to them.
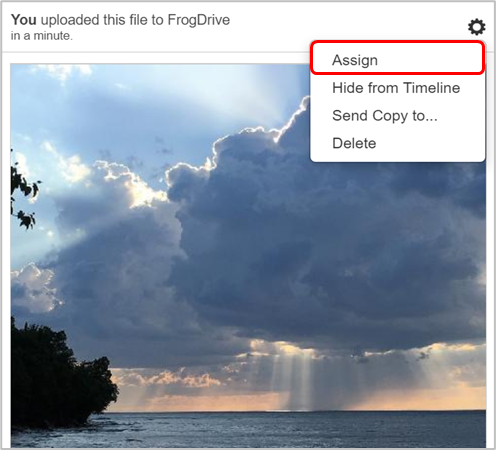
To assign an item on the timeline select the Action cog for that item, and then select Assign.
Searching for a User
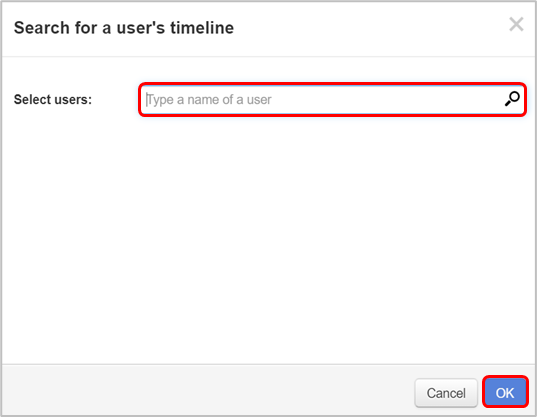
For safeguarding reasons, Admin and Staff users can search for and view the timelines of students and parents by selecting the Search for user button.
Type a few characters of the user’s name to reveal any matching students and parents in the system.
Select the required user and select OK.